Showing posts with label art. Show all posts

Feb 3, 2014

Big Art

The past few months I have been working on so many fun and different commissioned paintings. One of my favorites was a giant abstract painting for Suzanne, a friend from high school, and her husband Chris, who now both live in Chicago.

Suzanne's living room is gorgeous, classic, and very neutral.  The room has lots of symmetry and clean lines, so Suzanne was looking for something to tie it all together and make a statement.  Another challenge was her extra long couch and huge amount of empty wall space.

After chatting about a few different options, Suzanne went with my suggestion of going with one very large painting.  Since the room is so symmetrical and already broken up by the four couch cushions, and the matching tables, lamps, and chairs flanking the couch, we decided that one one large piece would help tie it all together, whereas two or three smaller paintings hung together might make the room look further segmented.  Here's the plan that we came up with for Suzanne and Chris: 

I made them the fun little "digital sketchbook" page above to help them visualize what we were going for along with the colors, and size, just to give an idea of the desired effect.  Suzanne also referenced one of my Etsy paintings that she especially loved for inspiration, to give me a better idea of the style that she was hoping for.  

The painting, (huge - 48" x 72"), took over an entire wall of our dining room and wouldn't even fit on my large easel, so I worked with it propped against the wall with a drop cloth on the floor.  The piece took me about a month to complete.

Here is the painting in its early stages, with lots of gestural brush strokes and movement.  This laid the foundation for the painting, on top of which I built layers of brush strokes and color.  


A few weeks later, and with many layers of movement and paint built up along the way, we ended up with this painting - playful, bright, and dynamic! 


Here I am holding the painting, proud and ready for delivery. It's HUGE!
Here are photos of the final piece, hung and installed (by Chris!) in their living room. 


I could not be happier with the way that it all turned out, and I cannot thank Suzanne and Chris enough for taking a chance on me and letting me work on this for them.  It was so much fun, and I am so glad that they are happy with it.  I LOVE big paintings! 

P.S. - Want to help me out? Please feel free to share or pin away on Pinterest if you see anything you like! I'm trying to grow my business and would love your help spreading the word :) 

Happy Monday! 


Etsy | Instagram | Facebook | Twitter | Pinterest

Dec 3, 2013

What now? Anthro + Art


one of my Etsy shop paintings! 
Friends!

Have I told you how awesome you are lately?!? Well, you’re all really awesome! I was blown away by the all the love and support you sent me following my recent blog post about my short-lived job from H-E-double-hockey-sticks... Wow! I am so glad I shared about that and was able to connect with so many of you over the perils of employment gone wrong.

So you may be wondering what I’m doing now that I quit my anxiety-inducing teaching job. I started working part-time at Anthropologie in September and am loving it! It’s a wonderful work environment and my colleagues are amazing. I love being surrounded by beautiful things and creative people while I am at work. I am learning a ton and recently received a promotion, which was really exciting!

Since I’m only working at Anthro part time, I also have time to myself to work on my paintings, and I am loving that! I’d love to see my business continue to grow, and so far it is really starting to take off. I am currently booked with commissions through the end of January! Right now, lots of the projects that I’m working on are hush hush (Christmas gifts!), but I look forward to sharing some photos of what I’ve been working on after the holidays. I also have my paintings for sale in one of my favorite shops, which is SO FUN! (If you’re in Virginia, you can check them out at Fraîche in Richmond! Side note: Fraîche also has amazing holiday decor!)

P.S. - Did you know that I now sell gift certificates that can be used in my Etsy shop or on commissions and custom paintings? You can choose your amount and purchase them here!

ALSO… 15% of all sales from my Etsy Shop (gift certificates included!) will be donated to ProNiño USA, a non-profit organization that helps street children in Honduras. My mom and sisters have been closely involved with this organization over the past few years, so I’m excited that I’ve found a way that I can also contribute!


Have a great week!!! Fa la la! 

Oct 10, 2013

Custom oil landscapes, perfect for the holidays!

I've decided it's time to break out my oil paints and get back together with my first love - little oil landscapes!

I've had such an interest in this, so I've decided to do something fun and special for the holidays: custom, 8"x8" oil landscape paintings in gold leaf frames.  I think that these would make such a wonderful, personalized Christmas gift!

Check out the details below, and let me know if you have any questions or would like to get on the list!


Fonts used: 
MasanaScript
Typewriter Hand
Type Keys

Paintings by Clare Wilkinson.

Enjoying what you see? Like Clare Wilkinson Studio on Facebook!

Sep 4, 2013

My artistic process

I receive a lot of questions about my artistic process and exactly how I complete my paintings, so I thought it would be fun to talk a little bit about that and share some progress photos that show the evolution of some of my pieces from start to finish. 

I have always been really inspired by abstract expressionist painters - I love the movement in their paintings and the visible brush strokes, marks, drips, and layers.  I really enjoy painting along the same lines.  

When I paint, I tune out everything and just begin painting spontaneously and intuitively, whatever comes to me, letting the movement of my arm and paint brush guide me.  These initial spontaneous strokes lay the foundation for the painting.  Once I have made some marks on the canvas, I step back and take a break.  I evaluate what is on the canvas, and think about the composition and color, and then figure out how to respond next - which areas are working well and which need more attention.  I build up layers in this way, painting spontaneously, then stepping back, evaluating, and responding deliberately to the brush strokes on the canvas and to areas in need of attention.  It is easy to overwork a painting, which sometimes results in painting over the whole piece and starting over, but it's all just part of the process. 

Stage 1: The foundation, gestural brush strokes. 


Stage 2: Building up layers and adding color. 


Stage 3: Filling in what's missing, adding tonal variations, and perfecting the composition. 


Stage 1:


Stage 2:


Stage 3:


Stage 1:


Stage 2:


Stage 3:


Paintings by Clare Wilkinson.  

Interested in my paintings?  Contact me, send me a message on Facebook, or visit my Etsy Shop

Enjoying the adventures? Like us on Facebook!

Aug 29, 2013

Lately {in the studio}

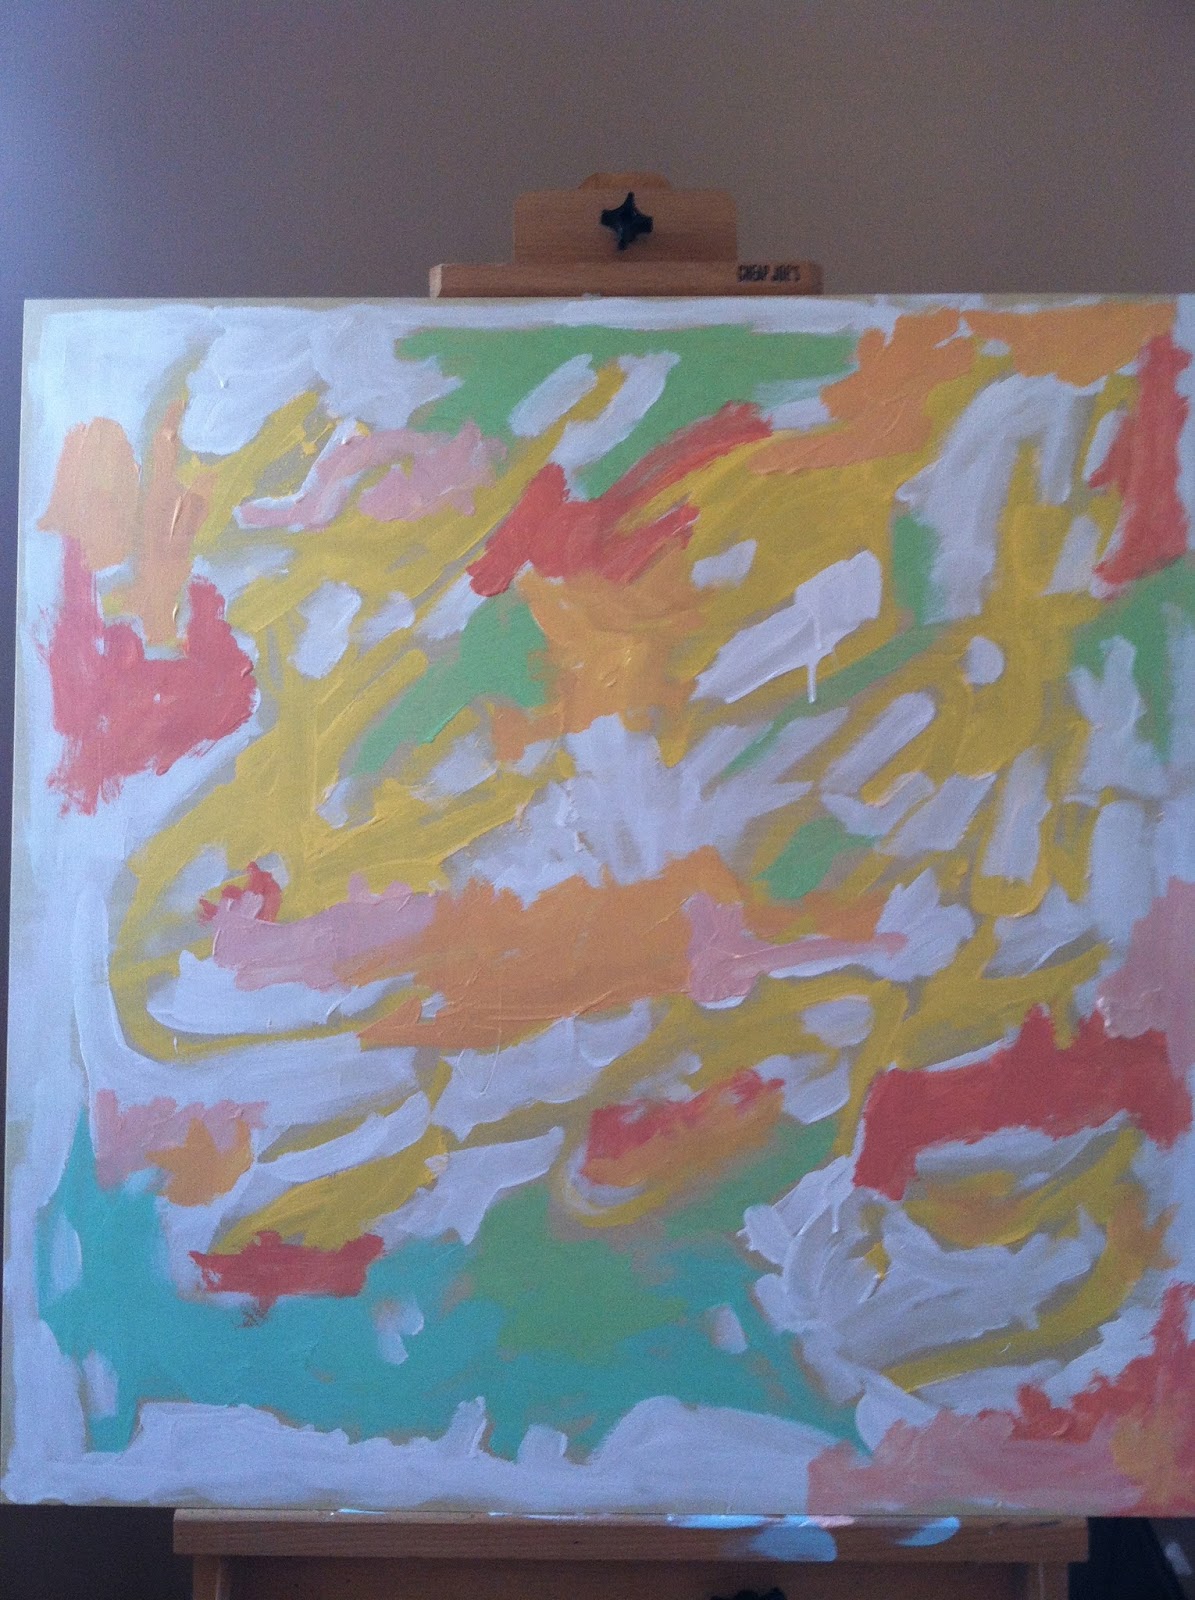
This summer, I've been lucky enough to spend a great deal of my time painting.  I love having the time and the space to create my favorite sort of paintings: large, abstract pieces.  Here are a few of those large pieces:


Currently for sale in my Etsy shop! 


I love painting on large canvases and panels because they leave lots of room for sweeping, gestural brush strokes and movement within the paintings.  I had so much fun working on  these pieces for clients, and can't wait to see what they look like in their new homes - that's always such a treat!  


Paintings by Clare Wilkinson.

Enjoying the adventures? Like us on Facebook!

Jul 9, 2013

Clare Wilkinson Studio >> now open!


Today I launched my Etsy Shop, Clare Wilkinson Studio!  I've spent the past couple of months working on paintings and ideas, and last week I finally took photos of my work, designed my logo, and figured out all the little details.  

In the shop you'll find original paintings in a variety of sizes, as well as a retro-inspired alphabet print (pictured above) that I designed and had printed for the nurseries of some dear friends and family who've had little ones in the past year.  New pieces will be added periodically along with some other ideas that I have in the works (I'm thinking custom house and room portraits!).  Custom paintings are also available, just contact me for details and pricing.  

I'd love for you to check out my Etsy shop, spread the word, and let me know what you think! 


Image by Clare Wilkinson

Enjoying the adventures? Like us on Facebook!

Apr 21, 2013

Thrifty Dining Room Update


Our new apartment is awesome.  It has lots of vintage charm, beautiful architectural details, and it's spacious (and yes, the dining room even came with that awesome chandelier!).  We are loving finding the perfect spots for all of our furniture and art, but still have a few areas that are looking a little sparse.  On a med school student's budget, we've had to resort to Ikea, thriftiness, and lots of DIY-ing to get our place looking the way we want it.

This weekend, we gave our dining room a little makeover with some inexpensive DIY wall art. The problem with our dining room is that it's huge with lots of wall space.  We hung a large mirror at one end of the room, but still had a huge expanse of wall space that needed something (or some things) big.  We have some large pieces of art, but already hung them elsewhere in our apartment.  

We didn't want to spend money on more art or frames, so we tried this simple DIY that we found on Little Green Notebook: Huge prints for only $4.  Jenny Komenda has amazing ideas, and I love her style!  I was so excited to finally have the chance to try one of her projects.


How to make it happen:

  1. Find some photos.  
  2. Make them black and white.  
  3. Save them on a flash drive and print them as large format architectural prints at FedEx Kinkos (around $4 each).  (You can call or check out the website before you go for info on sizing and how to save your files.  We saved them as grayscale images and converted them to PDFs.) 
  4. Buy some large pieces of foam core. (We found huge pieces at Dollar Tree.)
  5. You will probably need to cut the foam core to the size of your images.  Our photos ended up being 20"x26" and the foam core was 20"x28."  Use an exacto knife and a straight edge. 
  6. You can paint the sides of the foam core first (I painted ours peach).  
  7. After we cut the board and painted the sides, we trimmed the white borders off the photos (the easiest thing to do is to trim them using the large paper cutters at Kinkos after you have your photos printed).
  8. Use double stick tape to mount your photos to the foam core.  So easy.  
  9. Use 3M sticky velcro picture hangers to attach the foam core mounted photos to the wall.  

This was seriously so cheap and so easy! The entire project cost around $30, and we love the way that it brought some life to our dining room!


We have so many amazing photos from our adventures in the Caribbean over the past few years, and we were so excited to find a great way to put some of them on display.  I am pretty proud of the fact that we took all of these photos ourselves! 
  1. Kaieteur Falls, Guyana, South America
  2. Valley of Desolation, Dominica, West Indies
  3. Snake Steps, Dominica, West Indies
  4. Aba Wavine, Dominica, West Indies

*Advice for the Kinko's printing part:  

Print one image first to make sure it looks good. The photos came out really dark and streaky the first time (I think the printer needed new ink?). The guy who was helping me was really nice and lightened the photos and printed them on the extra large paper, which got rid of the streaks on the edges. I think he was supposed to charge me $7/each for the larger paper, but he was nice and didn't). Asking the guy if he could lighten the images and get rid of the streaks made such a difference, so definitely print one copy first to see what you think, and ask if they can help you make any adjustments if you aren't happy with the first print. This made all the difference! 

Also, these prints are not the highest quality and the paper is thin copy paper (not photo paper), but it is a great option if you want something inexpensive and dramatic. All this being said, we really do love how they turned out!


Font used: Amatic | Typekeys 
Arrow Photoshop Brushes from Creature Comforts
Inspiration for this project from Little Green Notebook

Images by Clare Wilkinson for C Squared W

Enjoying the adventures? Like us on Facebook!

Apr 15, 2013

Making it happen: an Etsy shop!


I've decided that it's time to open my own Etsy shop!  Opening my own shop and selling more of my work is something that I've wanted to do for a while now, but I've just never made it happen. I've always been too busy, too tired, or just lacking motivation.  Now that we've moved to Chicago, however, I've found myself with more time, motivation, and room to paint and create.  I've been blogging, drawing, painting, decorating, and just being creative, and I'm loving it!  

I've gotten some amazing encouragement from friends after posting photos of some of my paintings here on the blog, on Facebook, and on Instagram.  So, I've decided that it's time to make it happen.  I'm going to continue working over the next few weeks to create some more pieces and to get everything set up, but my own Etsy shop is definitely in the works.  

I'll keep you posted on the details!  Thank you for all the love and encouragement!

***UPDATE: My Etsy Shop, Clare Wilkinson Studio, is now open!!!***


Fonts & Brushes used: 
Pea Roxygirl from Kevin & Amanda
Arvil by Ben Dalyrimple from Lost Type Co-op
Arrow Brushes from Creature Comforts
Art and design by Clare Wilkinson.

Enjoying the adventures? Like us on Facebook!

Apr 11, 2013

Job hunting & creating


This week, I'm laying low and hunkering down on my job search here in Chicago.  I've updated my resume, searched, and started filling out applications and writing cover letters.  I'm looking for something that's either creative, non-profit, or in the education field, but am pretty open to doing anything that what would be a good fit for me.  In the meantime I'm getting creative and trying to supplement our income with some freelance art and writing projects.

I'm loving the inspiring words on my current desktop wallpaper and am hoping that this simple nudge of encouragement to "make it happen" will help keep me motivated.  

Any job hunting advice for me?  Or better yet, a job?  All advice and encouragement is welcomed! 


Images by Clare Wilkinson for C Squared W

Desktop wallpaper from breanna rose

Enjoying the adventures? Like us on Facebook!

Apr 6, 2013

My painting + Joy's Salon Wall

What a fun treat to check out Frock Files this week and find a beautiful salon-style gallery wall (and awesome tutorial) that included one of my paintings (top left).


What a striking room and wall - it all looks gorgeous! I love that most of the pieces that Joy hung have a special significance - pieces from friends from different walks of like, or collected on trips to favorite and sentimental places.  

For me, the art that we hang and collect is much the same way - it all has a story, and is tied to a place or memory.  I'll have to share an "art walk" around our apartment sometime to show you some of our favorite pieces and the stories that go with them. 

Do you have a gallery wall?  I've always wanted one, and have a random assortment of photos and small paintings that we haven't been able to find the perfect homes for.  They are currently living in boxes and waiting for frames... but I think that at some point, a gallery wall is in their future! 


Photo by Joy Uyeno - 
Frock Files

Enjoying the adventures? Like us on Facebook!

Follow my blog with Bloglovin

Apr 4, 2013

Make 'em: Ikat Knobs


I always swoon over the gorgeous knobs and drawer pulls from Anthropologie, but at up $10 a pop, they can quickly become an expensive, little update.  We recently acquired a cabinet for our TV on craigslist, and I wanted an inexpensive way to give it a fresh look that didn't require purchasing knobs that cost nearly as much as the cabinet itself.  

My solution? DIY ikat knobs made with wooden knobs that cost less than a dollar each and some bright paint.

Hand-painted Ikat Knobs

Materials:

  • unfinished wooden cabinet knobs
  • scrap paper
  • pen or pencil
  • paint (I used leftover house paint samples from Lowes)
  • a small, thin, pointy ended paint brush (for the details)
  • a larger paint brush (to paint the background)
  • polyurethane 
  • cup of water and a paper towel (to clean your brush)

Method: 


(a lighter color is better to begin with)
I found that the best way to achieve the ikat squiggly look was to paint diagonal line-like strokes extending across the width of each diamond section, filling in the diamond shape one brush stroke at a time.  

As you begin adding colors the paint may be transparent, so you will probably need to do a few coats.  I painted my design one color and one coat at a time.  (First all the teal, then all the yellow, then all the coral.)  I allowed each coat to dry completely and then went back in and touched up my top coats (just the yellow and coral).  During the touch ups you can try to better define the ikat-look with your short, diagonal brush strokes. 
Allow your knobs to dry overnight before coating them with a thin layer of polyurethane (apply according to the instructions on your can of poly).

Let me know if you make these, I'd love to see how they turn out!  Not into crafting, but want some hand painted knobs? Send me an email, I'd love to work with you to make some! 


Fonts used: Rochester, Type Keys 

Tutorial Images by Clare Wilkinson for C Squared W.

Ikat patterns: a: champagne culture // b: madeline weinrib // c: shumacher // d: greenwithglamor

Enjoying the adventures? Like us on Facebook!

Mar 28, 2013

New art!


Lately, I've been embracing my creative side and getting back into painting.  The images above are some pieces that I've been working on recently.  One of my goals is to really get back into it, and start doing commissions and selling more of my work.  I'm excited to already have a commission for two paintings booked, and am thinking of opening an Etsy shop as well. 

One of my favorite things about our new apartment is that we have lots of space, even room for a little office (where I am currently happily typing away) and a space for my easel (by the windows with tons of natural light), two things which we've never quite had room for.  I'm thrilled to finally have enough room to be creative with feeling like I'm taking over our entire apartment.  Our future is looking colorful! 

Interested in a custom painting?  Send me an email and let me know, I'd love to work with you! 


Font used: Penna

Paintings by Clare Wilkinson

Enjoying the adventures? Like us on Facebook!

Related Posts Plugin for WordPress, Blogger...